
If you struggle with constantly repositioning your hands or feeling some uncertainty in your swing, it may be time for new grips.
A common mistake most golf players make is failing to appreciate the significance of worn-out grips. Grooved, new grips are vital in enhancing shot control, consistency, and power on every shot.
Professional regripping services can be done, but they can be costly for frequent players or those who play often. Well, there comes the concept of a DIY golf club regripping into the spotlight.
If you desire a collection of equipment that will always provide optimum performance, you should be willing to learn this basic technique.
As an experienced golfer, I’ve learned that maintaining fresh grips is crucial for optimal control and consistency on the course.
Let’s dive into the step-by-step process and expert tips that will have you regripping like a seasoned pro.
Tools and Materials Needed
As you prepare to regrip, ensure you have assembled all the regripping tools and accessories you need.
This way, everything will be ready and allow us to avoid many problems that can arise in the process.
Golf Grip Tape
Golf grip tape is a double-sided sticky paper used to affix grips to the shanks of clubs. It offers adhesion, yet this tape can be adjusted for subsequent grip modifications.
The good quality grip tapes will last long and perform well on surfaces to enhance maneuvering. Choose the tape depending on parameters such as width (normally 2 inches) and the solvents used in your process.
New Grips
Choosing the right grips is an important aspect of your comfort and how you play on the golf course. Other features may include the type of rubber used, cord function, texture and density, rubber hardness or softness, and size.
The most used grips include Golf Pride, Lamkin, and Winn, which have different models to fit the personal choice of players.
Grip Solvent
Grip solvent is a liquid that cross-links the adhesive on the grip tape and provides a lubricating agent for the new grip. There are commercially available ones, but it is also possible to use mineral spirit or even odorless paint thinner.
Indeed, some players go to soapy water to save their funds for other crucial matters vital in golfing.
Utility Knife or Hook Blade
The cutting and peeling of excess tape require a sharp blade to ease the grip-stripping process. However, a normal utility knife may be sufficient, although many people slightly might favor a hook blade.
The curvature of the hook blade minimizes the chances of camming the shaft during grip removal and allows for precise cutting. When using any blade, cut with the blade facing away from the body and be gentle with it.
Vice (Optional)
Having a vice is not essential when regripping, but it does assist in steadying the club compared to holding it in other ways. It makes handling the tape and sliding on a new grip easier than when handheld.
An ideal golf club vice should have rubber or plastic-coated jaws to shield the shaft from harm. Some vices are intended for golf club work and contain a rotating head that enables the users to access all the sides of the grip.
Rubber Shaft Clamp
If using a vice, then a rubber shaft clamp is required to prevent damage to the shafts of your club.
These clamps have been developed to firmly grip golf club shafts while ensuring that they do not leave any marks on the shaft. They are made in different sizes to suit different shaft sizes.
Preparing for Golf Club Grip Replacement
Regripping is a complex process and requires careful preparation for the job to be done effectively.
A little extra effort invested in preparing your workspace and your papers will go a long way in making the process more pleasant.
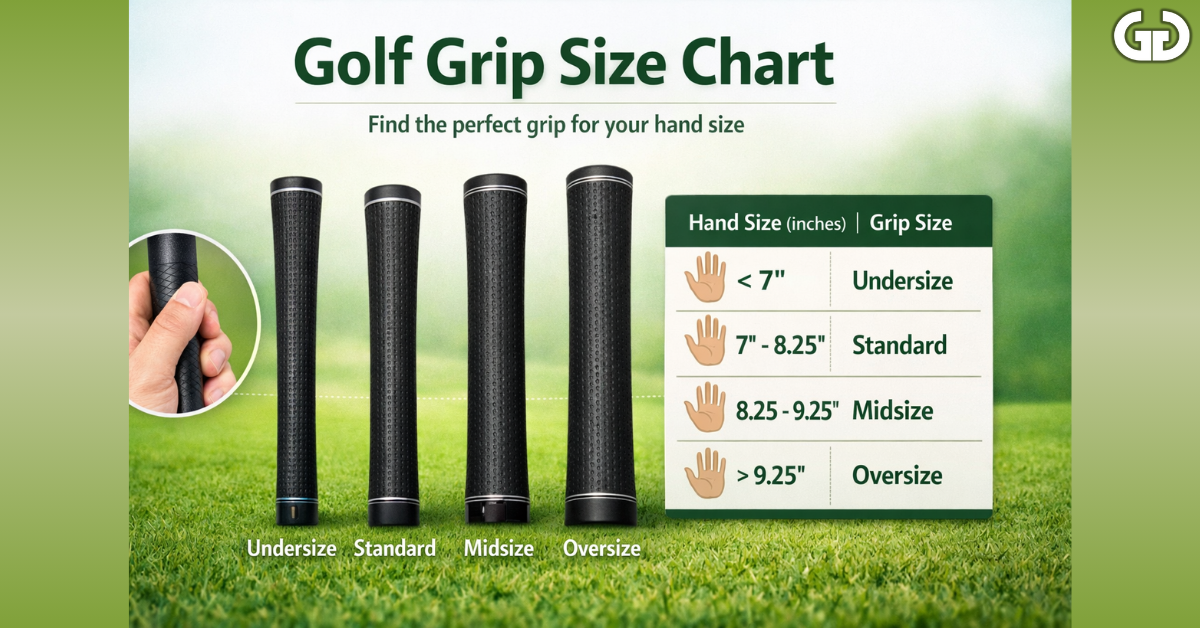
Choosing the Right Grip
Choose grips that you are comfortable with and that are appropriate for the type of playing that you do. What for? Depending on the object’s size, texture, and material, it can be utilized differently.
Ensure that your hands will fit the gloves following the given steps: Study various grips and review opinions from other golf players.
Setting Up Your Workspace
The environment should be well-lit and adequately aerated, so the place should be flat and have stable ground.
Lay down a cloth or some newspapers on your working surface to ensure that you can wipe any spills. Ensure that the electricity supply is within reach when using electric tools.
Organizing Your Tools and Materials
Ensure all your working tools and other input materials are well-arranged and easily accessible. Organise items in the order in which you intend to use them.
Ensure a trash bin is nearby to throw away old grips and tapes. Ensure solvents are stored in closed bottles, especially when not used.
Step-by-Step Process for Regripping Golf Clubs
Now that you are ready, let’s move to the real regripping part. The following steps should be followed to achieve a professional touch on your golf clubs.
Removing Old Grips
Proceed cutting along the length of the old grip using the hook blade without affecting the shaft. Remove the old grip and eliminate any traces of tape or adhesive around the space.
Hardened adhesive or tape can also be pulled off with the help of a special tool called a grip tape remover or a solvent.
Cleaning the Shaft
Make sure to clean the outside of the shaft with another piece of clean cloth, especially if these areas are greasy or dirty. If there is a persistent stain, using a little solvent and wiping it with a cloth could be worthwhile.
It is necessary to ensure the shaft is as dry as possible before moving to the next step.
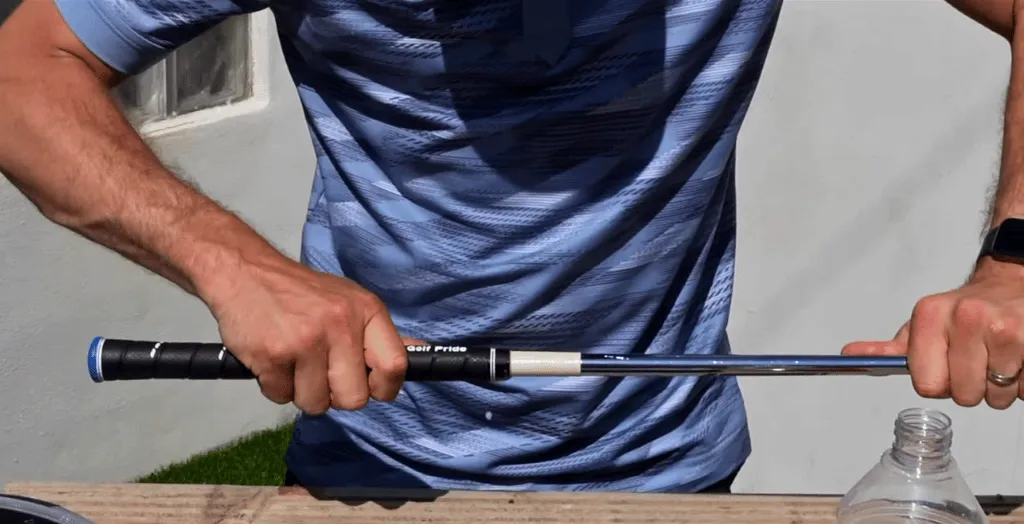
Applying a New Grip Tape on the Golf Club
Trim the grip tape to a length that spans the entire length of the hitting area of a club. It is also advisable to gently cover the shaft with tape, from the topmost part to the bottom.
As you apply, rub out any bubbles and wrinkles to achieve a crease-free and consistent surface.
Applying Grip Solvent
To begin with, fill the new grip with good volumes of grip solvent and swirl the solution to ensure it covers the inner walls of the new grip. Subsequently, pave over the shaft the excess solvent measured after taping the shaft.
This will make the adhesive react and, simultaneously, wet the surface of the grip, making it easier to install.
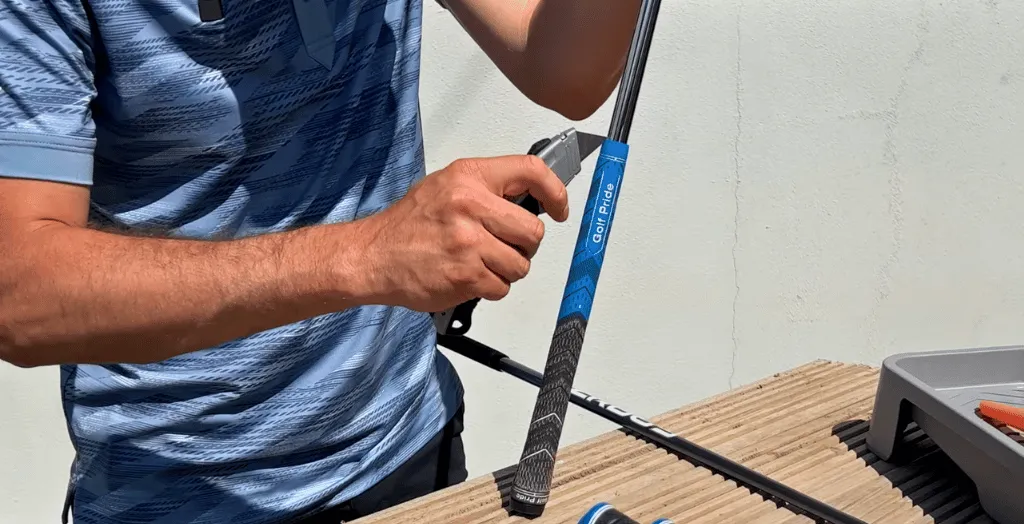
Installing New Grip
Slide the new grip onto the shaft as fast as possible, beginning from the butt end. When introducing the grip, apply substantial pressure to push the grip down.
If it gets jammed, one must add more solvent into the solution. Act fast, as the solvent will start hardening.
Aligning and Adjusting Grips
Once you get a grip on this, you have a small window to make the final settings you want. Position any logos or markings in the manner that is preferred.
Lightly strike the heel of the club on the turf with the butt end of the club to make sure that the grip moves down onto the shaft.
Tips for Successful Golf Club Regripping
When regripping, make sure to apply these essential tips while using them so that you can get the best results and a perfect grip.
Employment in a Well-Ventilated Place
Whenever regripping clubs, it is always recommended to do so in a well-ventilated area. This relieves the solvent fumes and shortens the time it takes to dry the paint.
Stay at a workplace in the open air or near an open window. If you work in a room or enclosed space, use a fan to enhance air circulation.
The Proper Amount of Solvent
Use enough solvent to create easy installation but do not overwet the carpet. When it is too little, the grip is hard to slide on, while the adhesive is negatively affected when it is too much.
Overall, it has been easy to find the right measures for installation and secure bonding over time.
Proper Grip Alignment Techniques
Beware of the grips’ orientation when mounting them. Nearly all grips have a guideline or logo that has to be parallel to the clubface. Use an alignment tool or simply eyeball it with another club to match it with all other clubs in the set.
Correct posture gives the player a good touch, resulting in a square clubface at the moment of contact.
Allowing Sufficient Drying Time
Once done, it is advised that the clubs should be allowed to dry up before they are used. This ideally takes around 6-8 hours, depending on the temperature and humidity levels.
Do not touch the grips during this period. The clubs should be allowed to dry overnight to get the best results before being taken to the golf course.
Conclusion
To regrip your golf clubs is a useful skill that can save money and properly maintain the equipment. This step-by-step guide and tips can make it easy for you to carry out this DIY project without any fear.
Just keep practicing, the saying goes that practice makes perfect, so if the first time is not perfect, do not be discouraged. However, you will improve your skill and speed each time you undergo a regripping job.
Not only will you have the satisfaction of maintaining your clubs, but you will also have the liberty of changing grips to fit your game.
Therefore, you should grab your tools, decide on your preferred hand grips, and give your clubs the makeover they require.


0 Comments